
Prepare a Solution
If you’re looking for an easy, effective way to remove tea stains from plastic pitchers, you’re in luck. The process is simple and straightforward. All you need is a little dishwasher detergent and some water. First, fill the plastic container with water or submerge/coat it in water. Then add two tablespoons of dry or liquid dishwasher detergent to the mixture. Let the mixture sit for about 15-45 minutes, depending on the size of the stain. The stains should lift right off the plastic with ease. If needed, repeat the process until all of the tea stains are removed. This is a great way to keep your plastic pitchers looking their best.
Scrub the Stain
Once you have prepared your solution, you can begin to scrub the stain. Use a soft-bristled brush or scourer to scrub the tea stain gently in a circular motion. You may need to use a little elbow grease and extra time to get rid of the stain. Avoid using too much pressure as it can damage the plastic. Once done, rinse the pitcher with warm water to remove all traces of the solution and the tea stains.
Rinse the Pitcher
After scrubbing the tea stain, it is important to rinse the pitcher thoroughly. Do this by running cold water into the pitcher to remove any remaining soap and debris. You can also use a clean cloth or sponge to help remove any residue. Make sure that all of the soap has been washed away before moving on to the next step.
Apply Vinegar and Baking Soda
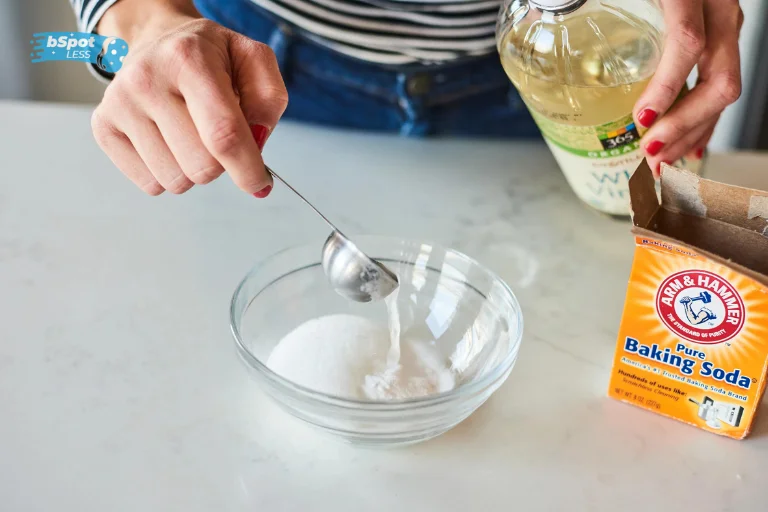
If the stain is still present, it’s time to break out the vinegar and baking soda. Mix equal parts of water and vinegar and pour it into the container. Give it a good stir and let it sit for 10-15 minutes. Then, add a tablespoon of baking soda and stir until the mixture foams up. Let this sit for another 10-15 minutes before rinsing it off. If the stain is still there, you may need to repeat this process until it’s gone. To avoid any potential staining, be sure to use a BPA-free plastic pitcher like the G.E.T. BPA-Free Shatterproof Plastic Ice Tea Pitcher with Lid, 2 Quart (64 at Walmart.com).
Check Your Progress
Once you’ve scrubbed the stain, it’s time to check your progress. If the stain has lightened up, you can move on to the next step. If it’s still stubbornly clinging to the plastic, you may need to repeat a few of the steps we’ve discussed so far. If that’s the case, go back and scrub the stain again with a clean cloth. You can also try applying some vinegar and baking soda as an additional cleaning solution.
Let the Pitcher Soak
Once you have applied the solution of vinegar and baking soda, let the pitcher soak for a few minutes before scrubbing the stain. This will give the solution time to work its magic and lift the stain out, making it much easier to remove. If your stain is particularly stubborn, you may want to let it soak for up to an hour. To ensure that the solution remains effective, you should add more of it if needed. Once you are satisfied that the stain has been removed, you can move on to the next step.
Scrub with a Clean Cloth
If scrubbing the stain didn’t help, try using a clean cloth. Scrub the stain gently with a cloth soaked in the detergent solution. Move the cloth in circular motions around the stain. This should help to remove any tea stains that were left behind. For tougher stains, you may need to use a toothbrush. Make sure to be gentle so that you don’t damage the plastic pitcher.
Wash with Dish Detergent
Once you have scrubbed the stain with a clean cloth, you may want to take the extra step of washing the pitcher with dish detergent. To do this, fill the pitcher with water and add two tablespoons of dry or liquid dishwasher detergent. Let the mixture sit for about 15-45 minutes, depending on the size of the stain, and then rinse thoroughly with clean water. The dish detergent will help to break down any remaining tea stains and make sure that your pitcher is completely clean and free of residue.
Use a Toothbrush
If the stain is still visible after you have scrubbed and rinsed the pitcher, you may need to use a toothbrush to get into the grooves and ridges of the plastic container. Use a gentle toothbrush and some of the cleaning solution you have prepared to scrub the stain. Work in small circles and make sure to get into all the nooks and crannies. Rinse off the pitcher and check your progress. You may need to repeat this process several times before the stain is completely gone.
Rinse Thoroughly and Dry
After rinsing your pitcher, it is important to thoroughly dry it before storing it away. To do this, you can use a soft, clean cloth to pat the pitcher and lid dry. Make sure that there are no remaining traces of detergent, vinegar, or baking soda left on the pitcher. Once you are satisfied that your pitcher is completely dry, you can store it away until it is needed again.