Are you in the middle of a bathroom remodel but having trouble with your shower door frame? If so, don’t worry! Removing silicone caulk from your shower door frame is actually a lot easier than you think. In this blog post, we’ll show you how to do it quickly and easily.
Prepare the Area
Before you start removing the silicone caulk from the shower door frame, you need to prepare the area. Start by taking off any hardware or fixtures that are attached to the frame. This will give you better access to the caulk and make it easier to remove. After that, it’s a good idea to cover the floor with a drop cloth to protect it from any potential mess and spills. Lastly, make sure that you have plenty of ventilation in the bathroom, as some of the chemicals used in the removal process can be hazardous. Once you’ve prepared the area, you can start gathering supplies for the job.
Gather Supplies
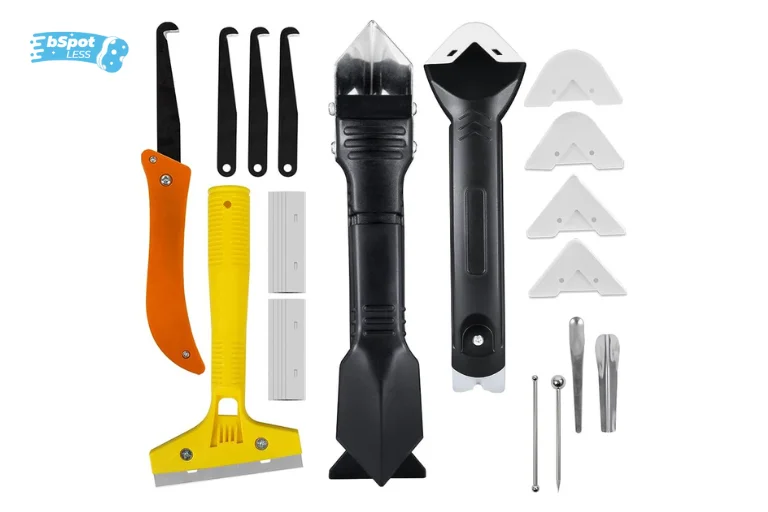
In order to properly remove silicone caulk from your shower door frame, you need to have the right tools and supplies. These include a chemical caulk removal solvent, a utility knife, a cloth, plastic scraper or an old credit card, 5-in-1 silicone caulk removal tool, razor scraper, 3 in 1 silicone caulk removal tool, and a putty knife. You may also need tape measure, level, 1/8” and 3/16” drill bits, hacksaw, pencil and caulking for any repairs you may need to make after the caulk has been removed. Once you have all these supplies ready to go, you can move on to the next step of removing the caulk.
Apply Heat
Once you’ve prepped the area, it’s time to apply some heat. You can use a heat gun or a hair dryer to soften the caulk and make it easier to remove. Make sure you don’t overheat the area, as this can cause damage to the surrounding surfaces. Hold the heat source about 6 inches from the caulk and move it evenly around the area until it is softened. Be careful not to let the heat contact any electrical components or wiring in the area.
Scrape the Caulk
Once you have prepped the area, gathered the necessary supplies, and applied heat, it’s time to start scraping the caulk. This is where a razor scraper comes in handy. Use the blade to carefully and gently scrape away at the caulk. Be sure to angle your blade away from the shower door frame, so as to avoid any damage. If you notice any tough spots, you can reapply heat to soften them up and continue scraping.
Use Chemical Solutions
If you have been unable to remove the caulk using the methods above, you may need to use a chemical caulk removal solvent. Before using any type of chemical solution, make sure to wear protective gear such as goggles, gloves and a dust mask. Spray the chemical solution onto the caulk and let it sit for a few minutes in order to soften it. Once the caulk has been softened, you can try to scrape or wipe it away. Be sure to ventilate the area and rinse away any residue that may be left behind.
Use a Caulk Remover Tool

In addition to the tools mentioned above, you may also want to consider a caulk remover tool. These tools are specifically designed to help you remove silicone caulk from shower door frames and other surfaces. They feature an ergonomic handle for comfortable use, and a razor-sharp blade for precise cutting. They come in various sizes and shapes, so you can find one that fits your needs. When using a caulk remover tool, use caution as the blade is extremely sharp and can cause serious injury.
Use a Putty Knife
If you’re still having difficulties removing the silicone caulk from the shower door frame, you can try using a putty knife. This tool can be used to scrape away any remaining pieces of caulk that have adhered to the surface. Be sure to use a plastic putty knife, as a metal one may scrape and damage the frame. If the caulk is still stubbornly sticking, you can try using a heat gun to soften it up before scraping with the putty knife. Once you’ve removed all of the caulk, it’s time to move on to the next step.
Rinse and Wipe Away the Residue
Once you’ve scraped away all the caulk, it’s time to rinse and wipe away any residue. Use a damp cloth to wipe away any remaining caulk. Make sure you don’t leave any residue behind as this can cause further problems later on. Once you’ve wiped away all the residue, it should be fully removed from the shower door frame.
Scrub Away Any Remaining Residue
Once you have removed as much of the sealant as possible, it is important to scrub away any remaining residue. A soft-bristled brush, such as an old toothbrush, can be used to gently scrub away the residue. Make sure to use a light touch as to not damage the surface of the shower door frame. Once you have removed any remaining residue, rinse the area with warm water and then dry thoroughly.
Clean and Dry the Area
Once you have removed the silicone caulk from the shower door frame, it is important to clean and dry the area. Use a damp cloth or sponge to wipe away any residue that may remain. Once the surface is completely clean and dry, you can apply a new line of caulk. Be sure to use a high-quality silicone caulk to ensure a long-lasting seal.
